

In Part I I showed you how I created the mop for the Shopsmith. I wasn’t sure what to expect when I first tried it out, having never used a mop sander before…well, it wasn’t exactly stellar ;0). But I have improved on my origional idea and I think it’s going to serve me well.
Making some adjustments
On the original version I had crammed 5-48 sheet packs of mop sand paper onto my rod with 20 flutter sheet spacers and it created a “cloud” when turned on and put against wood. It was way too aggressive to get into grooves without really rounding down the edges of my work piece. I knew I would for sure need to do something about dust collection.


You can see in the pictures that my newer version is about 3 inches longer than the original. I added a nylon washer between each set until I ran out, then a metal washer every other set. I had enough sand paper left over to make a small mop using mandrel for hand drills and drill presses I had ordered with the paper. I might try a threaded rod if I ever re-do it just to make tightening everything down a little easier.
Building the Platform
One of the nice things about using the Shopsmith is you have built in height adjustment. The regular table is too high, the tilt mechanism takes up too much room….but if you happen to know someone who doesn’t use their table, and is willing to donate their legs, you can build an easily adjusting platform for your sander.


If you don’t have such a nice friend, the same thing could be accomplished with an 1 1/4″ dowel or pipe, series of parallel holes drilled through it and a hitch pin. My platform ended up being 13 1/2″ wide by 19″ long. The rails are for the dust collection house to rest against.
Dust Collection House


The Dust collection house needs to be built separate from the platform. I say this because I almost started attaching the two just like I was building a bird house or something…then remembered, it needs to come off so you can put it around the spinning rod. I just used some “Draw Tight Catches” I found at the hardware store, never would have guessed that was their name ;0)
After looking things over I decided I wanted the back closed in a little more and I might add some sort of “mud flap” if it’s still leaking too much dust. Once you get it adjusted you could also throw some duct tape over the rod openings on the side. Can’t wait to get to work not the trim for the house!!
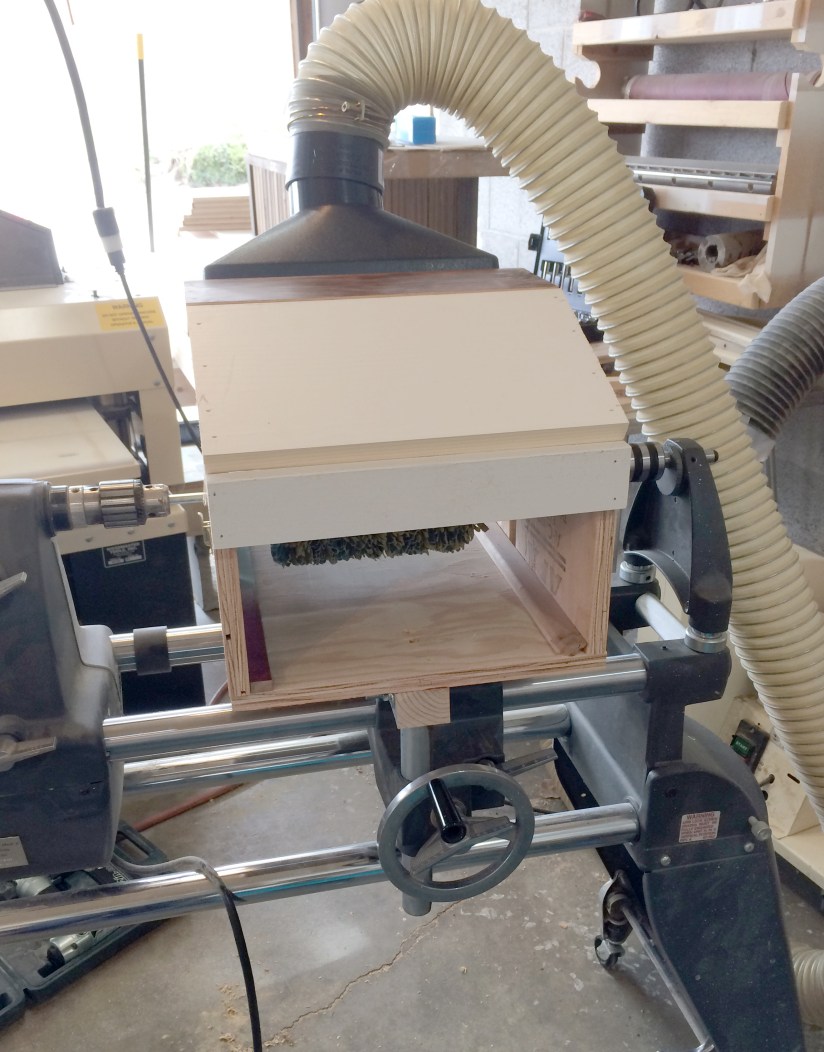
All in all this is a big improvement, there wasn’t a noticeable cloud of dust when it was in use like there was before I spread out the sandpaper and added the dust hood.

3 thoughts on “Molding Sander for Shopsmith Part II”