

At this point in this project I’m beginning to feel like I might never get done….and that I will run out of logs before I cover the floor :0/.
I’ve been milling the logs into as many 3×6” beams as I can. Sometimes it’s only 1, other logs have had up to 3 good beams in them with a couple of partial ones. I chose 3×6” beams because they as big as I could easily cut on the miter saw, or table saw if necessary.

Then I started to slice and slice the beams into tiles with the miter saw. I set a stop and turned on the shop vac and cut and cut, Miller some more beams and cut some more…

I felt like I had so many tiles at this point….but I only had enough to do about 150 square feet. There are 12 sections scored into the concrete of the shop that are roughly 9×9 feet. This is enough to cover one and a half sections.

First order of business was to attach a frame and plastic to the shop floor. Water will come through concrete a little and I don’t want my floor to rot, so this is 6 mil plastic. The boys at the hardware store said these screws would anchor the wood to the concrete.
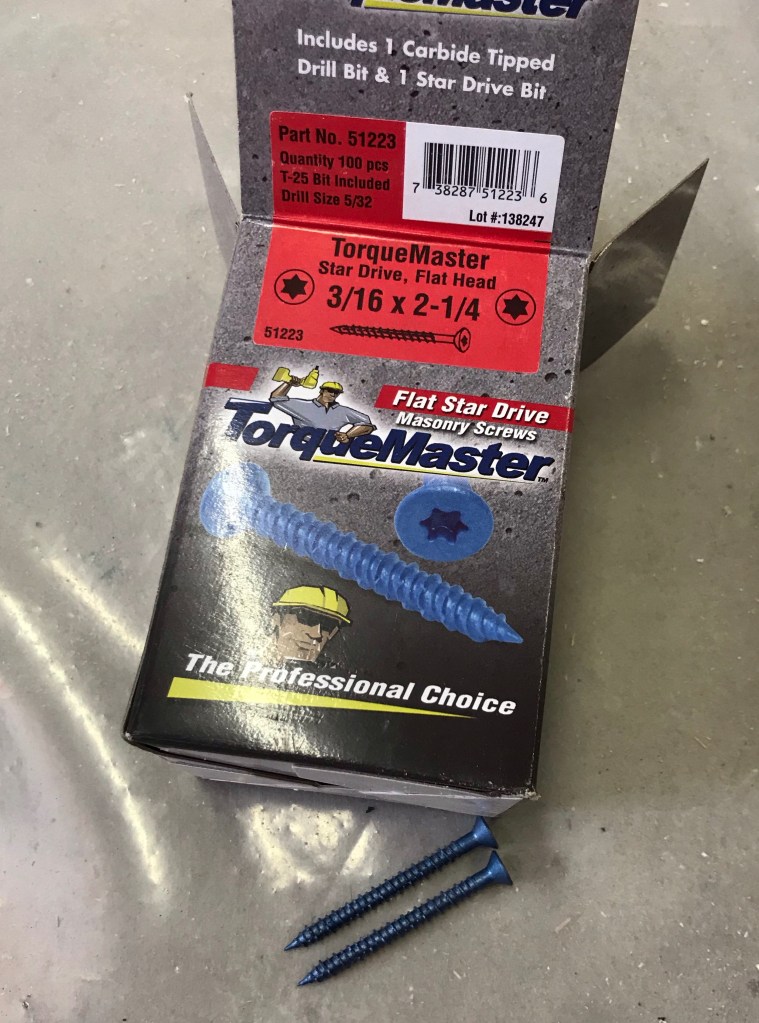
I just needed to corresponding drill bit to use with a rotary hammer drill. I asked the sales clerk how many drill bits I would break trying to get the floor in…he said I was buying a good drill bit and shouldn’t need another. for some reason I believed him….

I started drilling holes the next morning and tried putting the screws in, none of them were very tight. It seemed like the depth gauge on the drill wasn’t set quite right, so I kept adjusting it. Finally it was rather obvious that my drill bit was rapidly getting shorter and should not be mushroom shaped at the end ;0).
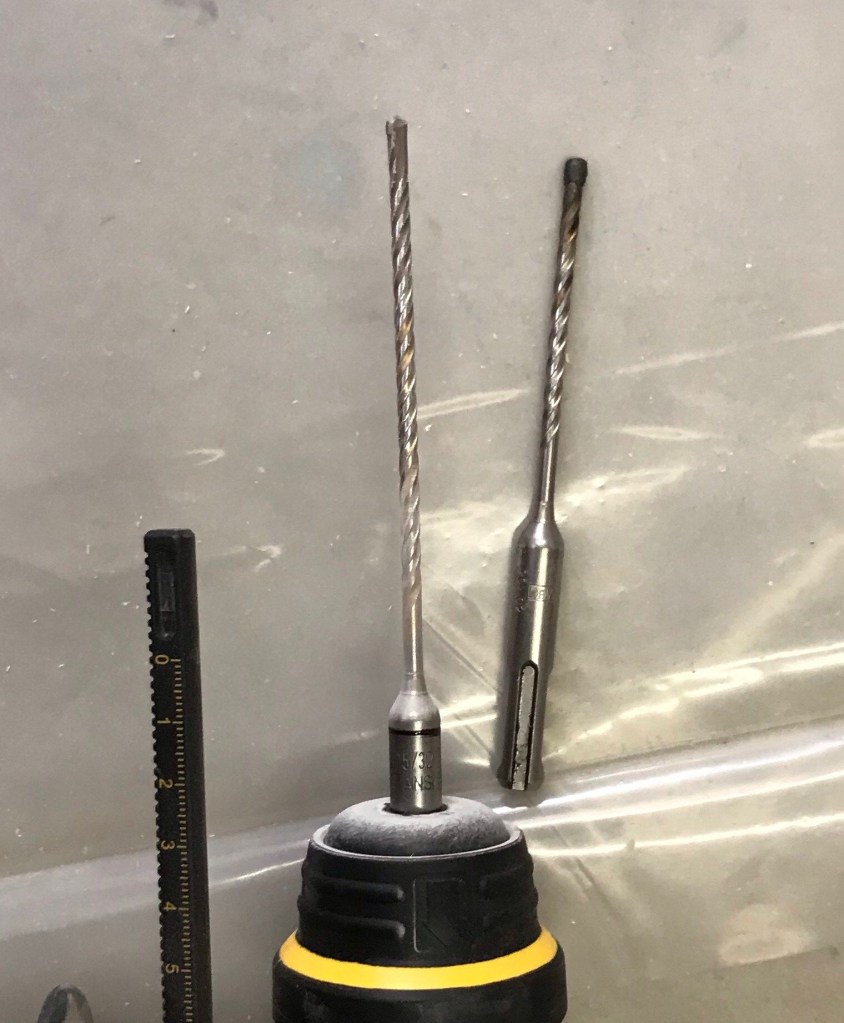
I was a bit frustrated that what I had wasn’t working out so I took a couple of screws and my drill bit back to the hardware store. A very nice sales clerk named Neal explained that I had hit rebar. Very first hole. I probably didn’t notice since I was still getting used to the drill. I bought two more drill bits and headed back home to try again.

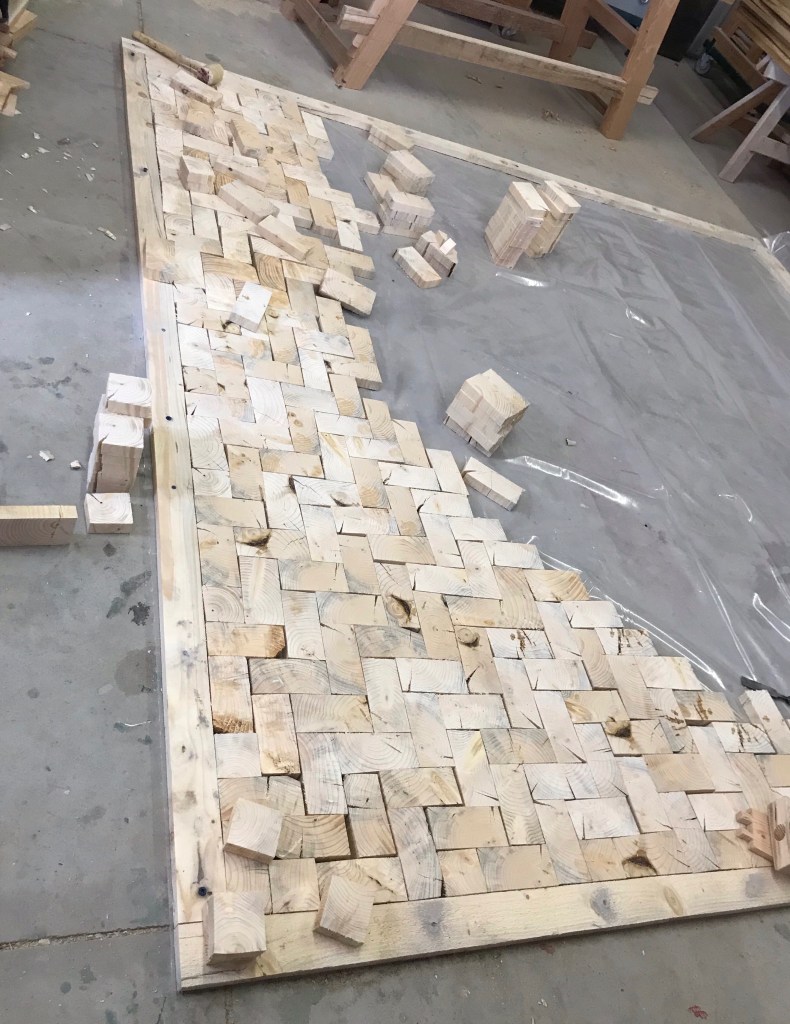
Herringbone is my favorite brick pattern, so that’s what I started with. For a while it seemed to be going just fine…then the discrepancies in the size of the beams started to really show up…by the end of the square I was just trying to get them in to fill the space.
My idea was to use sand to pack them in like pavers on a patio. The first bag of paver sand I bought had some cement powder in it and stained the wood grey where I dumped it. Here I am sweeping it into the cracks.

Wes helped my tamp it down a little further into the cracks. We added a little more sand as he shook it down. I hope my idea works..,,this is a lot of floor to glue down if it doesn’t.

Just stepping up into this floor off of the concrete makes a huge difference you can feel immediately. I can’t wait to get a few more sections done and put everything back together :0)
Don’t forget to hit the follow button, or like my page on Facebook “Girl with a Hand Plane” for more projects and tips!

Love the new post. Love you also, Mom
On Sat, Sep 19, 2020, 8:29 AM Girl with a Hand Plane wrote:
> Jenn posted: ” At this point in this project I’m beginning to feel like I > might never get done….and that I will run out of logs before I cover the > floor :0/. I’ve been milling the logs into as many 3×6” beams as I can. > Sometimes it’s only 1, other logs have had ” >
LikeLike