

Here we are at the final assembly!!!! You can read Part I, Part II, and Part III here. Let the fun begin!!
Let’s start at the begining of the mantle. You can read about my crown molding cutting woes here. And seriously, getting all of the angles and bevels right on trim an be confusing beyond belief. Until the clouds part, the sun comes out and it all starts making sense.
In this picture I knew how long the mantle was going to be measured from the bottom, and I knew that I wanted it to be 10″ from the wall to the front edge….but nothing else so I had to work backwards from those two measurements. I cut the sides a bit too long, attached my corners and then measured the top to see how long to make the sides.
Doing this again… I would have made sure to use a square scrap of wood with a couple of temporary brads to help get everything square.
Measuring and cutting the sides to length.


Now that I knew the measurement for the bottom, it was easy to cut a piece of plywood and nail it inside the bottom of the crown molding. On top of the crown molding went 3″ of straight board with a 3/4 rabbet for the top piece plywood to set in. This straight piece was glued and nailed up through the top of the crown molding into the bottom of the straight piece.

Next order of business was to cut and install some support ribs. This was actually pretty easy since both angles on my crown molding were 45 degrees. I cut these out of scrap plywood and spaced them out somewhat evenly. My measurements weren’t exactly the same from one side of the mantle to the other, so some of the ribs required trimming.
This is where your arsenal of hand planes comes in…which one to start with first? I started with the low angle block plane at the project and quickly decided it would be much more efficient to get out the jack plane and take the board to the vice. A couple of passes and everything was flush.


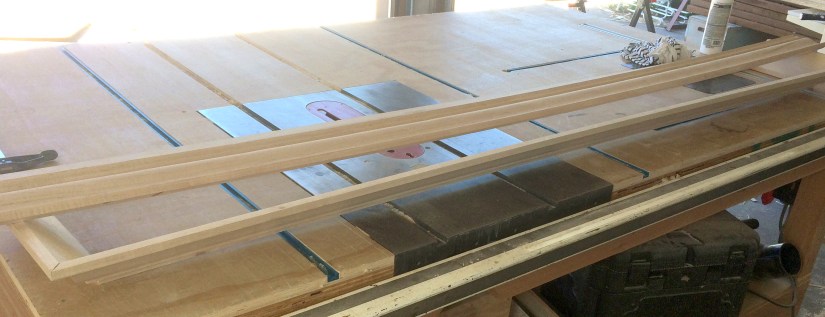
This seam was going to require a bit of dressing up, and I had just the router bit I wanted to try out! A nice 1″ astragal bit that would be perfect for this kind of thing. With only 1 catch….it is very difficult to get the board through the router without any chatter marks, even with feather boards. Out of the three I tried the last one almost made it…but still had visible mars from me being human and not a machine.
Otherwise it was pretty easy to run the board edgewise through the router, cut off the length of molding on the table saw and repeat until I had three. Then looking at them, I decided they would be better a little bit thinner so I shaved off the back on the table saw.


Time to get all the pieces put together!! The mantle was screwed onto the bottom, I measured from the edge and drilled counter sink holes before screwing it together.


One it was all secured in place I could measure and cut out the top. I used 2″ nails to on the ribs, then pin nails around the edges to secure it.


This is another part where you need to pull out your hand plane ;0). The crown molding wasn’t quite square on the sides, the front seemed to be closer to flush, but both sides needed to be shaved off slightly before I could add the final trim around the seam.


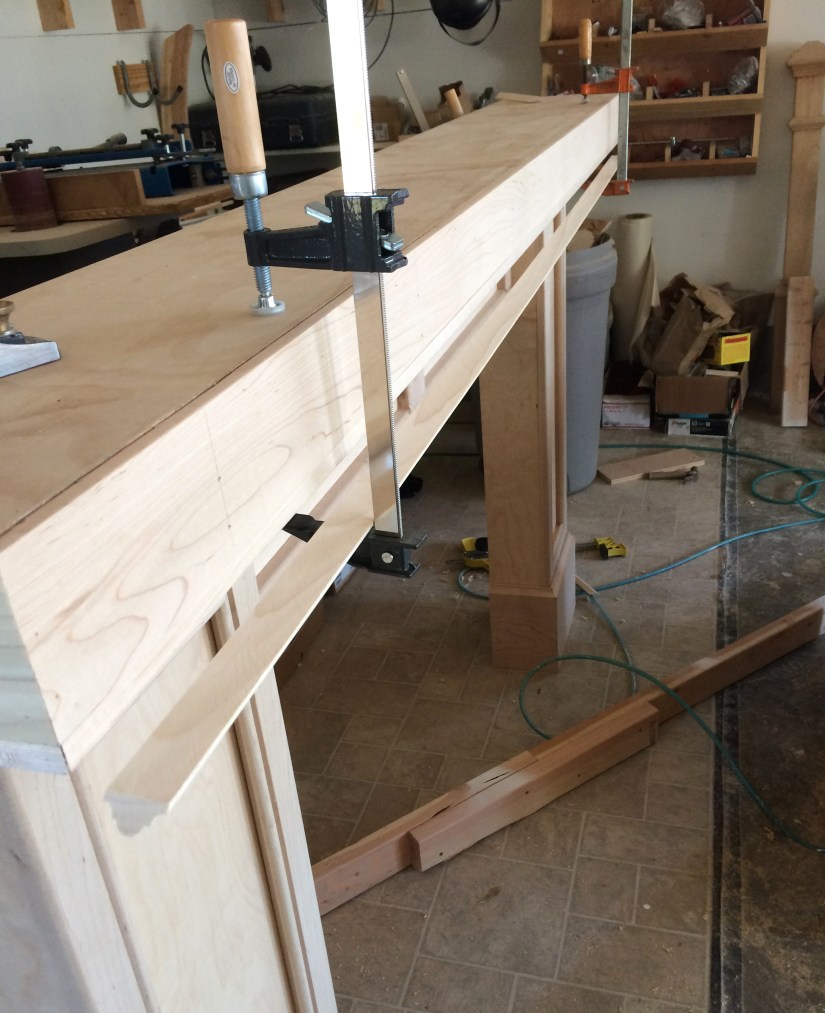
The trim I cut for this seam proved be very long and a bit flimsy, so I threw some clamps on to serve as second hands while I glued and pin nailed it in place.
The final touch was a bit of cove molding under the mantle. I described my headache trying to figure out how not to be confused here. Seriously, it took me forever to figure out that you just need to cut it from the same direction it goes on. I was trying to cut it cove side up and couldn’t figure out which way to mark it, which way it went once I got over to the fireplace, why was this sooooo confusing???


Just when you think you can start painting….you realize it is going to take just about “forever” to get every single nail hole puttied…then sanded and in some cases puttied again. I also used a chisel to clean up the corners that didn’t quite line up. If your chisel is sharp enough, it should slice right through hardwood with minimal pressure.


After sanding for about three years, I finally had everything ready for paint. It was starting to feel like I would never get to this point. As you know, the devil is in the details, and making sure they’re all taken care of makes all the difference when you’re done!


I blow everything off with the air compressor, wipe down with a rag before I start painting. It really is worth doing both steps, the air gets all of the large particles, but not the really fine ones. If you’ve sanded enough, the rag shouldn’t leave lint.
Here we are with a coat of primer…then you need to sand again, blow it off again and wipe it with a rag. Again. But it’s okay, because you are sooooo close to the really fun part. The primer raises the grain slightly and sanding is vital to getting a smooth top coat. About half way though sanding I realized I could pull out my mop sander, chuck it on the drill and us it on all the little details that are such a pain with regular sand paper.


Now that all of the work is done, it’s time for the really fun part!! I just installed a Jet air filtration system in the garage a little over a month ago and it makes painting in there so much better!! Before there would be a little cloud of paint particles floating around, with the air filter turned on the air was pretty much crystal clear with no haze floating through the sunbeams. The only draw back was that the paint stuck to the outer filter and I had to buy a new one ;0).


Two coats of Sherwin Williams Emerald later….and it could really use one more, but I was out of paint and stuff always gets banged around when you’re installing. Oh yes, we are ready to install this.
Don’t forget to hit the follow button, or like my page on Facebook “Girl with a Hand Plane” for more projects and tips!

4 thoughts on “Fireplace Remodel: Part IV Final Assembly”