

Getting enough wood Cleaned up with a scrub plane and planed to the correct thickness took quite a while….but finally I had enough ready to glue together for the top. I needed to cover 8 lineal feet 32” wide, from my experience flying up the top for a Moravian bench I haven’t finished yet, I knew finding enough straight pieces of oak out of my stash would be a challenge. I opted for gluing up 3 different slabs and running the grain on the two ends opposite of normal with the center section parallel to the longest side.

Try as I might, I didn’t get my glue up anywhere close to perfectly flat. That meant a lot of cleanup with a hand plane. I had a little help on one and it still ended up being 2 days worth of cardio ;0). Not that it took two full days….I just had to feed people and other important stuff between working on them.
My favorite for this type of job is my Sargent 414 Jack plane. It helps to attack a flattening project like this on the diagonal, you get less tear out that way. Keep you iron honed and the sole of the plane waxed and it goes rather quickly.

I used some home made counter top bolts to connect the panels together. My friend made them for me with Wesley’s supervision. I was very thankful for this since the one local hardware store I visited didn’t have any :0)

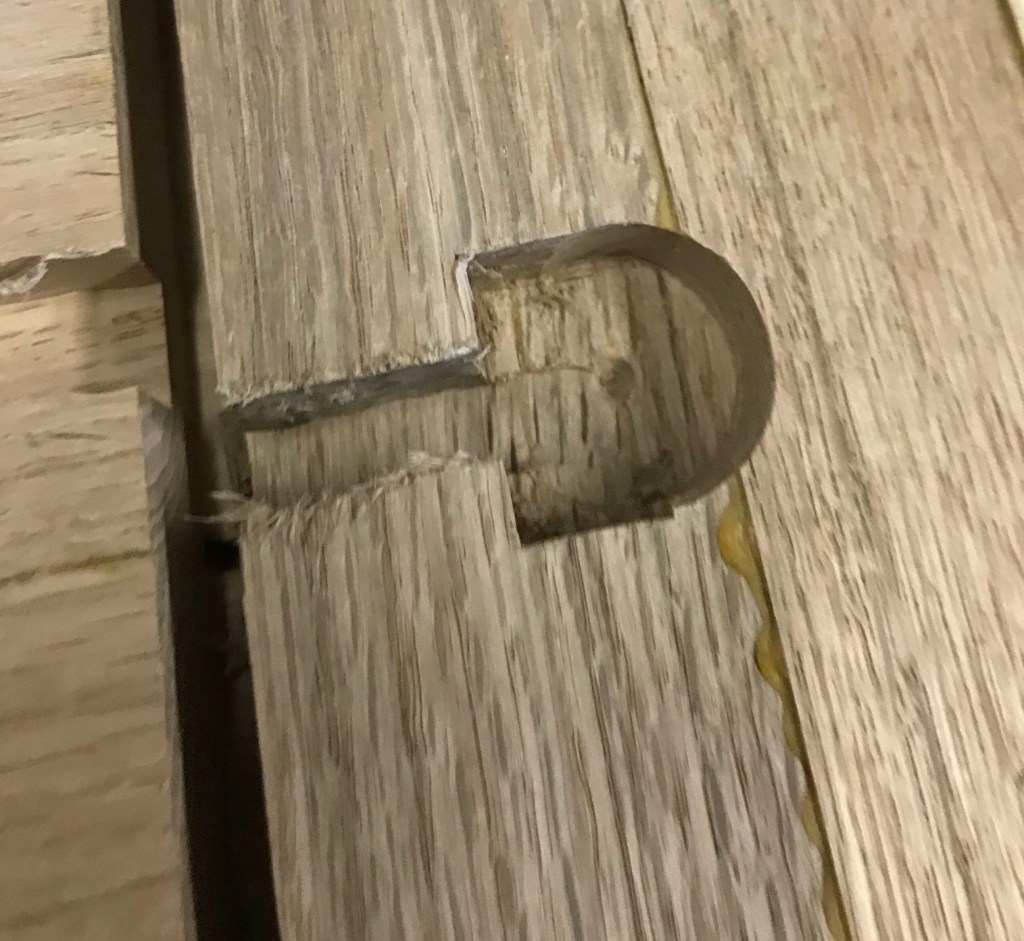
To install them you drill a hole with a Forsner bit and connect the holes with a router, then square the hole. I’ve seen ready made counter bolts that have a curved washer which would eliminate the chisel work.

I didn’t cut the straight Chanel all at once, I started pretty shallow and used three passes to get to depth. I just free handed these….and chose the prettiest one to take a picture of.
Here’s a picture of how it looked assembled. The bolts tightened up nicely and pulled the panels right up next to each other.
At this point we ended up doing some major rearranging in the shop. Some big equipment left from my husband’s flour mill left for its new home, a grain bin went to the back room and all sorts of odds and ends were moved out. With all that gone I decided that the milling room and other large metal stand should leave as well. This added around 200 square feet of available shop floor and a week to this project :0)

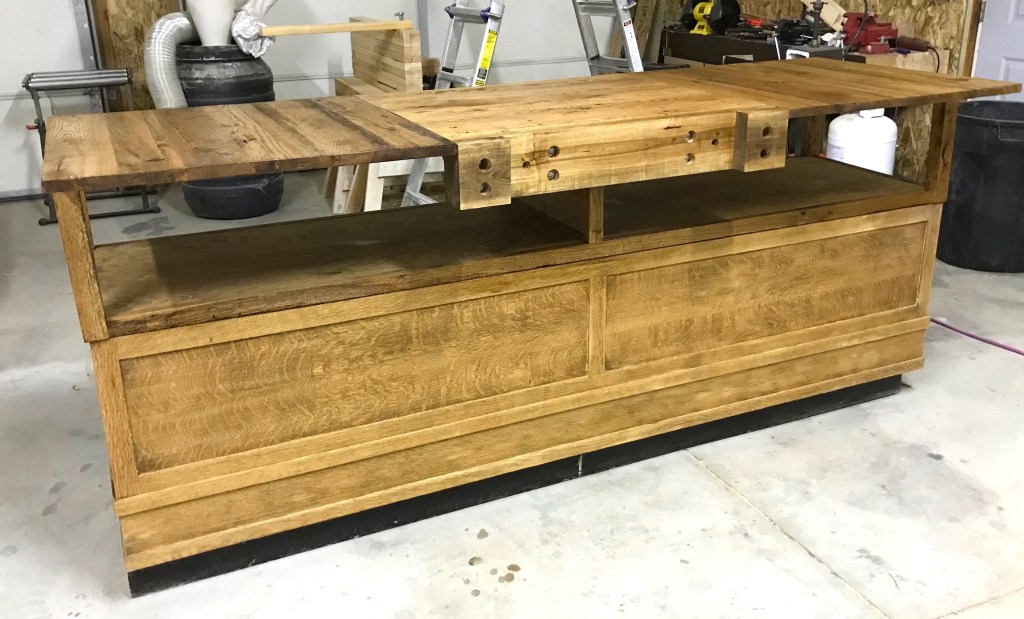
It was a big day to finally be able to set the completed top on the frame. The gap you see is where the Moxen vice is going to be fitted in. I predrilled all of my screw holes from below first with a 1/2” Forsner bit, then a complete pilot hole. a pile of screws later I had a secured top!

Now the real fun began! Attaching the vice to the work bench. I had already mortises in the nuts for the rod to fifth through and glued on the two side pieces….then realized I could have hidden all of the bolt holes if I hadn’t glued things together two weeks before. Next time I will know better.
Truth is, I hadn’t quite figured out how I was going to attach the vice to the workbench yet and wanted to make sure my holes lined up perfectly for the threaded rod. I might try to plug them some day, in the end I just had to buy longer bolts to go through that part.
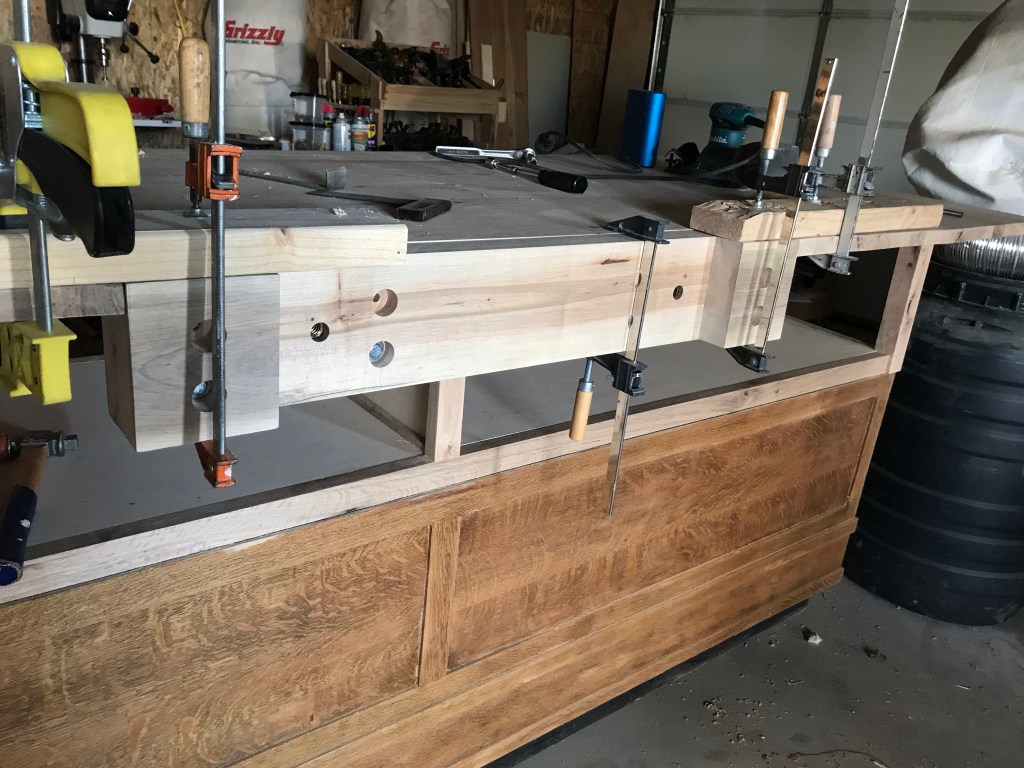
After looking things over, the simplest solution was to add in 4 gussets between the vice and frame and bolt it all together. Easier said than done getting things to line up and fit where they are needed ;0). Somehow it all came together fairly close to where it was intended.

I screwed the top of the bench to the gussets from the top. On 6 of the holes I used the right Forsner bit and plugged them…the other two are a cautionary tale of checking you size twice before beginning.

At this point I’m just waiting for the machine shop to finish putting handles on the Moxen Vice screws and this will finally be done! It seems like it took forever to piece the upper portion together and I’m pretty happy with how it turned out! The walnut colored Danish Oil really brought out a lot of ray flecks in the oak and masked a bunch of flaws :0).
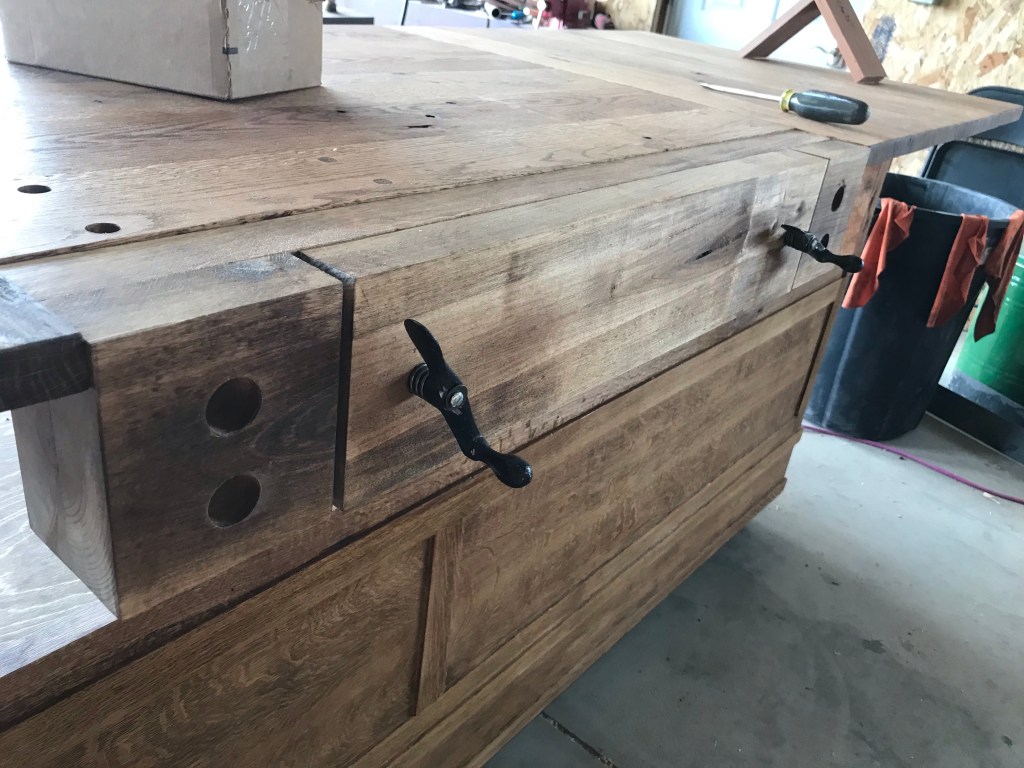
Finally I have my handles back from the machine shop. I bought new clamps and took some of my pony clamp handles in to be attached to 3/4” acme rod, I really like how they turned out! I got home, threaded them in, then realized I would need some washers before the handles could be tightened all the way :0/. Drat! So close! It ended up being a four 3/4” washer cure and all was well with the world ;0).
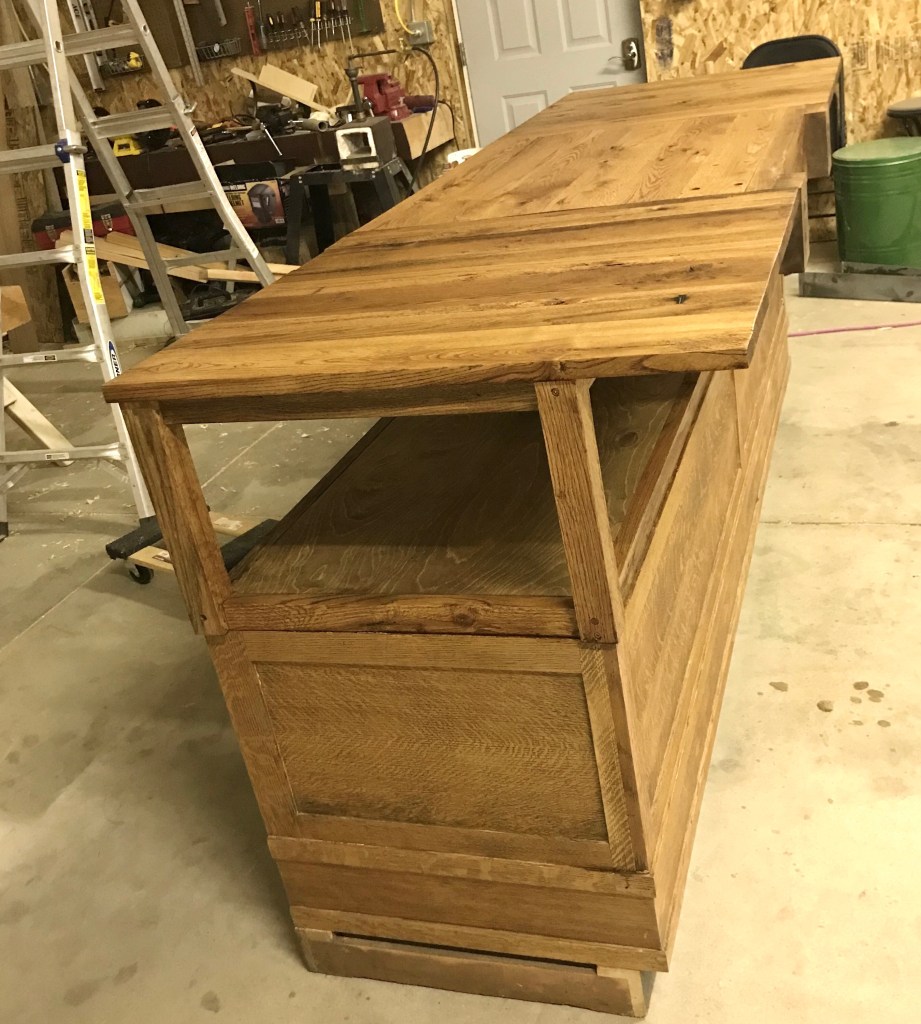
The shop is slowly getting put back together! The Moxen Vice work station is done!!!! Time to put it to use!
Don’t forget to hit the follow button, or like my page on Facebook “Girl with a Hand Plane” for more projects and tips!

4 thoughts on “Moxen Vice Work Station”