

All the pieces to the Adirondack chair I started on in late June have been taking up space on one work surface or another for months. After all, this was the project that sent me to the ER back in July and I found plenty of other things to work on. Now that it’s colder, it’s time to get into the shop and build some things!
I have really only used the router table once or twice since July, it was still really scary to think about using…..so just didn’t use it. But once I started working on the chair, I realized there were pieces that still needed to be shaped. I had an abundance of mismatched knobs, so the first order of business was to add knobs to all of my pattern pieces.

Of course all of the screws were too long and needed to be trimmed, something close to 40 of them. That was rather long and tedious, hopefully worth it though since I’d like to make more of these chairs in the future.
When I started setting up the router table I noticed that the plate I was using when I had my accident still had blood or something splattered on it. It didn’t really boost my confidence that I could do this….anyhow, I cleaned it up and moved on.
I didn’t stop to take pictures, I was too busy concentrating on what I was doing for that. It took shaping a half dozen pieces for the chair and rounding over all of the necessary edges to feel like I could do this with confidence again…with a regular straight pattern bit :0)

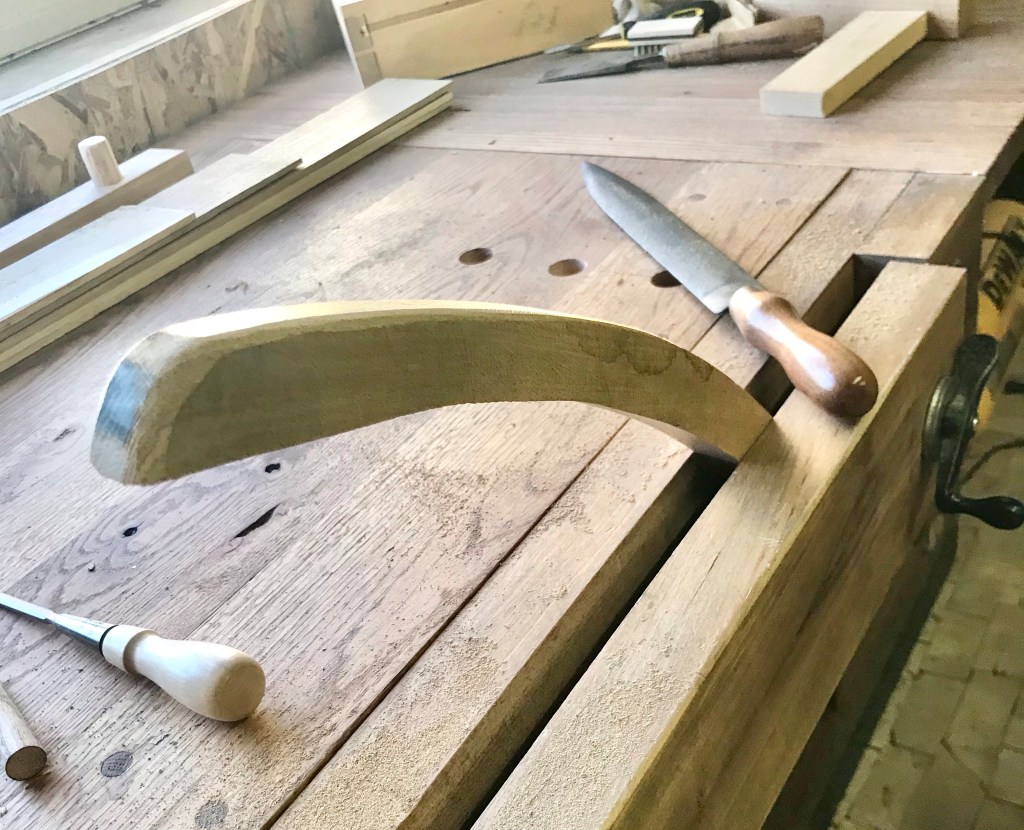
When I got to the small support piece that had cause me all my grief I decided that it needed to be finished with hand tools. First, I had chucked that particular pattern piece into the dumpster early in the morning after I had my accident, and wasn’t about to tempt fate a second time. The outside curve I used a plane to smooth the wood down to the line. The inside curves I used a spokeshave on. And it got closer to the line….but nowhere near perfect.
As long as I was using hand tools, I decided to use a rasp to round the edges over. So in the piece went to my Moxen Vice and I rounded the outside edges. I really using the Moxen Vice work station when I’m finishing a work piece. It puts it closer to eye level and reduces strain on my neck and shoulders. After using the rasp I sanded it smooth and drilled the holes for the screws to attach it to the chair.
Finally the assembly of the chair could begin! And it was a slow process getting everything put in place!
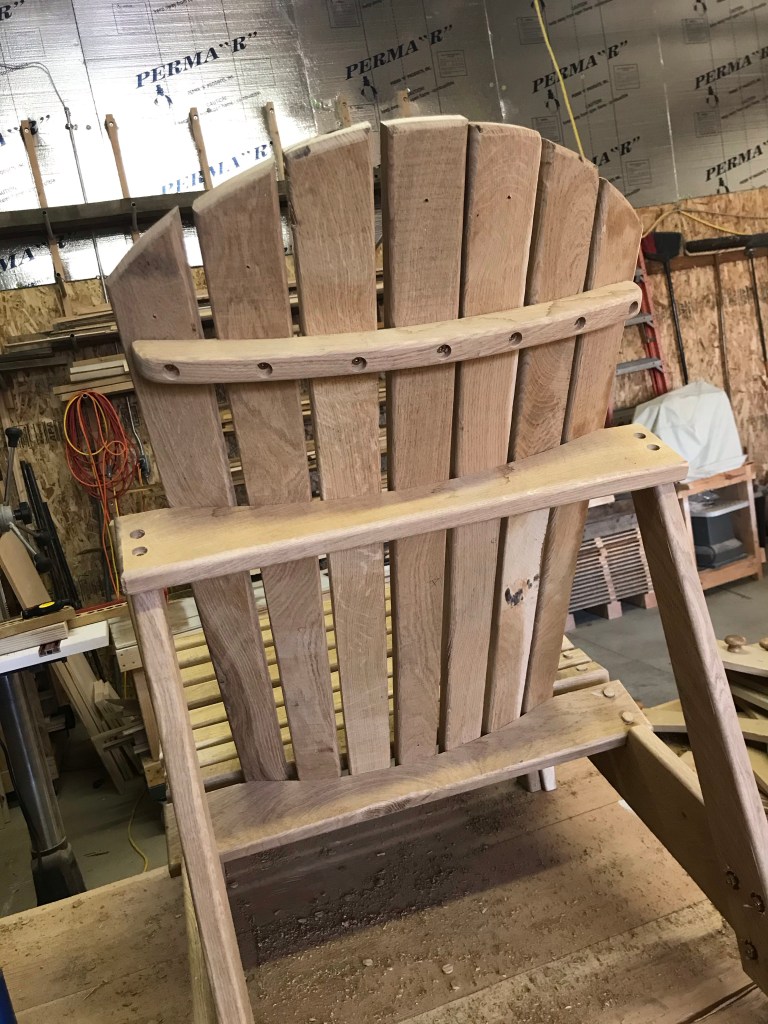
When I got to this piece on it felt like a huge victory! The piece that had caused so much pain was in place. It was was rather a big moment to be able to step back and look at the almost completed chair.

I love green, and had chosen this semi-transparent stain months ago and was so happy to finally see it on the completed chair. Except for the four holes I forgot to plug….which I did later ;0)

Although it was intimidating using the router table again after avoiding it for months, I’m glad I faced my fears head on and finished the project that that sent me to the ER. Not to mention this is a really comfortable chair to sit in :0) You can find the pattern here on Rockler’s website.

Congratulations Jenn for facing your fears and finishing the chair.
LikeLike