
This is the second project I built for my nieces last month. B’s Swedish Ladder can be seen here. L’s loft shares the same wall in the opposite room and was quite the puzzle to figure out. As I was cutting dado after dado into the beams I kept hoping that I had in face put everything in the right place. I almost did ;0).
The front of the loft features a railing, ladder and shelves for Knick-knacks. The side facing the wall in the rim will also have a railing.

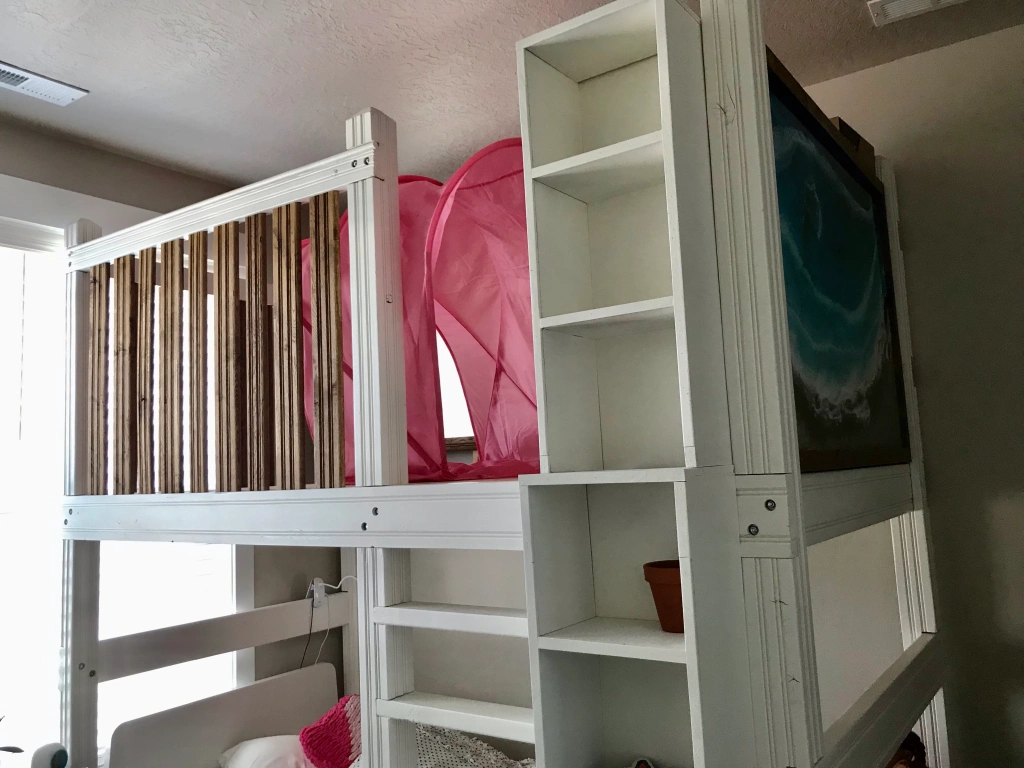
The back of the loft will have a large magnet board and shelf at the other end for books etc. the back of the shelf facing the hallway will have an ocean resin scene on it. My sister wanted something a little artistic to look at as she went into the room.

Notice I’m using my Moravian Workbench , it was really handy in setting up to do these dado’s for the shelves. The loft has three separate shelving units, which made for a lot of dados getting cut out with the router. Between the circular saw fence guide and the vice on the workbench, this went as smoothly as possible.
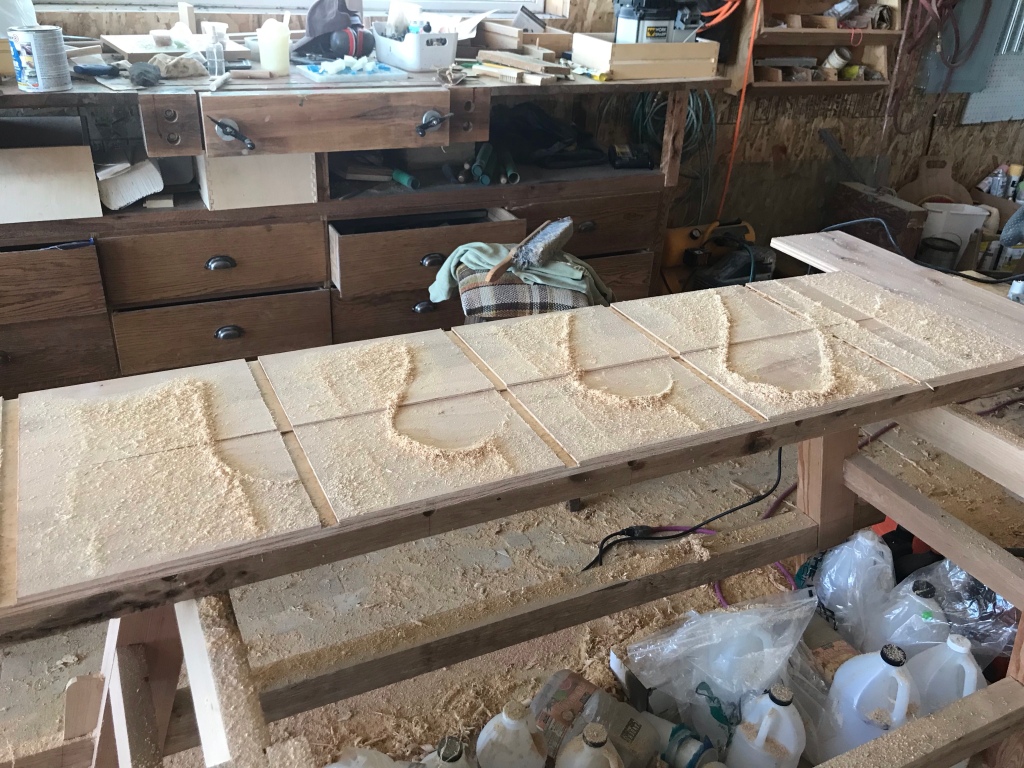
Once the shelves were completed and set aside, it was time to start decorating the rest of the lumber with a bead board dado blade in the table saw. I used this one “forever ago” on my Kitchen cabinets. It was nice to have an excuse to get it out again and make something pretty ;0)

I’m always surprised at how many shavings this produces. They started leaking out of the table saw housing long before I finished despite having the dust collector going the entire time. They’re just the right amount of curly that doesn’t vacuum up very well, they like to create clogs in hoses and all sorts of inconvenient things. But it really does add a nice touch to an otherwise plain project.

Not sure why I chose to take a picture of the top I messed up on. I started at 45 degrees and quickly realized it was too much and cut back to somewhere between 20 and 30 degrees to cut the tops of the posts. You can see the stop I used in the picture to keep everything even on all 5.

And now began the scary part, marking out the dados for all of the cross pieces and ladder. Once I had them marked I set the circular saw to the depth of a 2×6 and cut kerfs through all of the waste material. Wash. Rinse. Repeat. For every post, some of them had quite a few and keeping track of which way everything would be facing and what side the dado should be in occasionally made my brain hurt :0/
Once all of the kerfs were cut it was time for the chisel and mallet to clean them all up. I used a shoulder plane on B’s project, but found on these that a sharp chisel was all I needed.

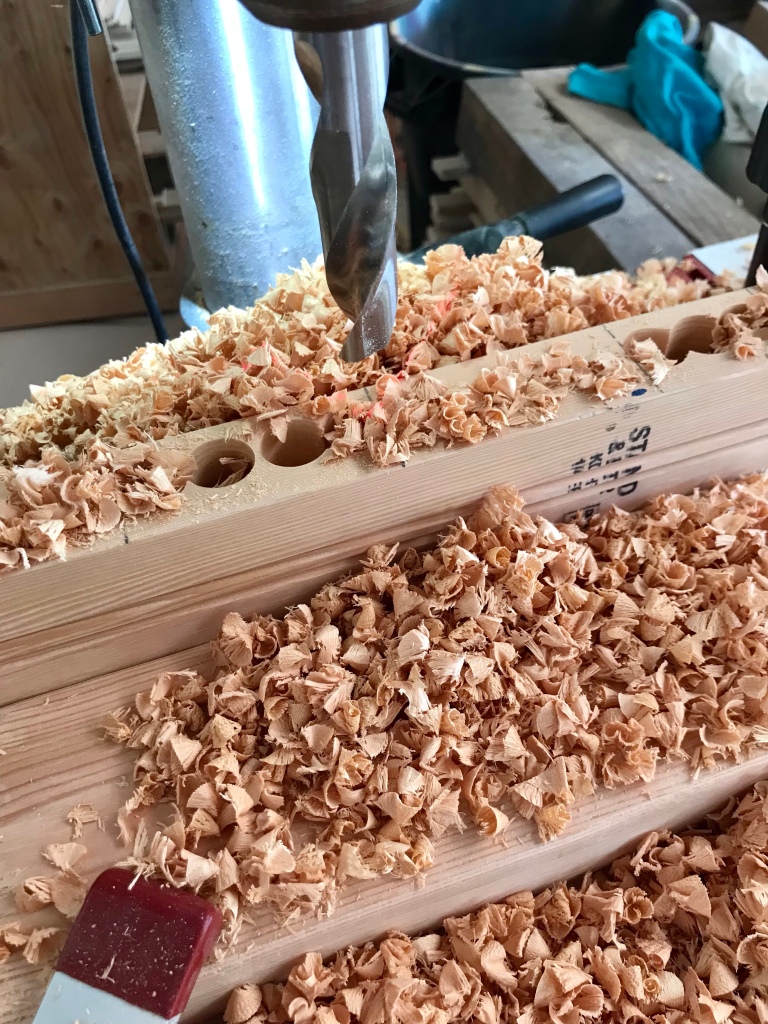
The front and side railing were mortised in both top and bottom, this was a lot of drilling at the drill press then clean up with a chisel.
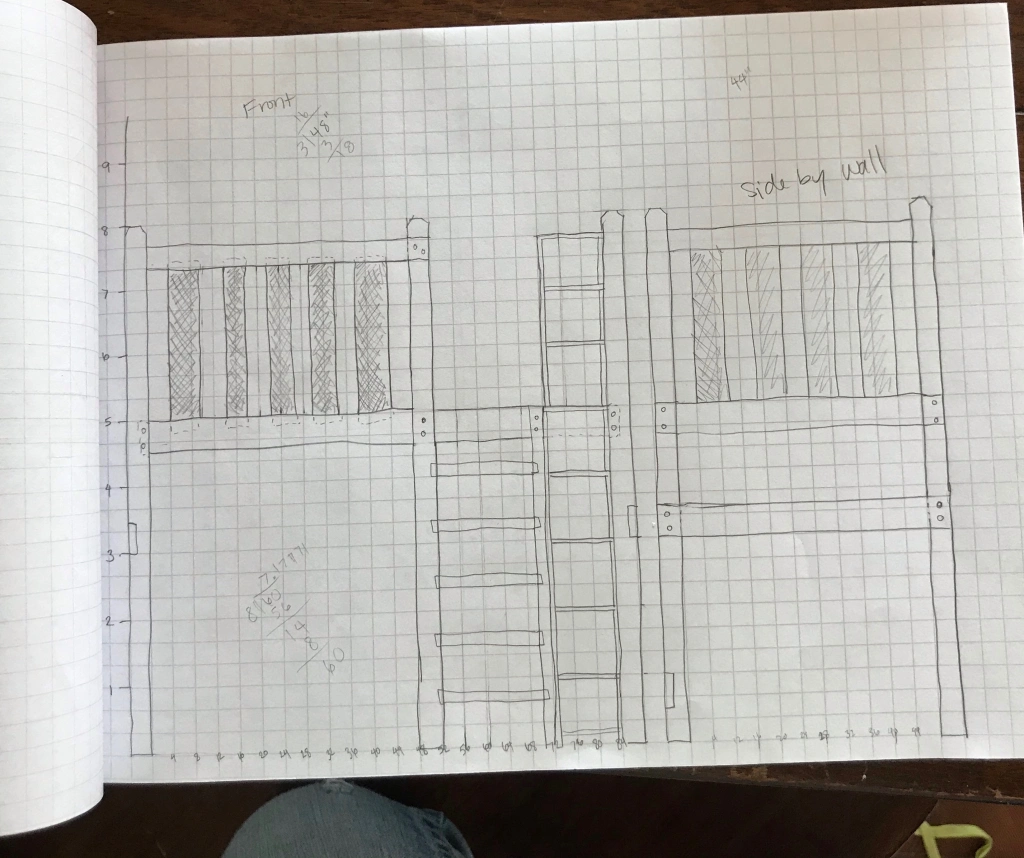
Speaking of things that make your head hurt, trying to get slats to come out even with even spacing is one of them :0/. I think my brain was on vacation and couldn’t be bothered to help out with this. I sat down with the graph paper multiple times to try and get it planned out and it was way more tedious than it should have been.
It was about this point in the project that my oldest daughter came out to the shop and told me the place was “a fire hazard.” I’m not sure what she means, just because I hadn’t cleaned up the pile of bark from Cleaning up the live edge wood, had been hand planing everything smooth and drilling out mortises…..okay, fine. I hauled three trash cans of debris out of the shop when I got back from the install, almost all of it perfect for starting fires. She may have had a point ;0)

And finally here we are with a pile of lumber that greatly resembles a jig saw puzzle. As we were unloading into my sister’s garage my brother in law said something to the effect of, “I hope you know how all of this goes together.” As a matter of fact, I did!
Prior to taking everything down for assembly Kendie and I clamped it all together so I could drill the holes for the bolts. I found out quickly that I didn’t have as many clamps as I thought I did…

I’m glad I did this, there were a couple of small graph paper errors I was able to correct. And it was nice to know that it was going to fit together in the end. This also gave me a chance to double check my measurements for the plywood bottom and shelves.

I had big plans of having everything sanded and primed prior to leaving for Utah…in the end I spent my first day there getting everything ready to paint. All of the wood needed a final sanding prior to being primed and getting all of the rungs for B’s Swedish Ladder and the slats for L’s loft stained took time, bolting the loft together took time. Running around town for odds and ends took time.
Two days later I had a coat of primer on everything. The primer sanded, then two coats of paint applied to everywhere I could reach….and everything I didn’t need to rebuild :0/

Getting the lost installed in L’s room was quite a bit less involved that putting the climbing wall up in B’s room. There were more pieces to put together but it seemed easier to get together. The size of the room made it difficult to get a good picture u fortunately.

Here we are attaching the bookshelf to the corner posts. On the back side of the bookshelf I made an ocean scene to keep things more visually interesting. It was still a bit tacky when I needed to start cutting wood so there is a bit of man glitter in the scene.

The girls realized they needed handles to help get up the ladder. I didn’t think of that when I recessed the ladder under the loft, next time I might bring the ladder out a little one way or another in the design.
L couldn’t wait to start moving her stuff in! I never did get a completed picture with all of the shelves empty. I guess that means she approves!

There was a bit of a tape measure error on the ladder and I had to completely rebuild the back railing. Oops! At least none of the errors were on the frame itself.


I hope she gets hours and hours of enjoyment from this loft. I know my kids would spend a lot of time reading in a place like this or drawing pictures on the magnet board.
Don’t forget to hit the follow button, or like my page on Facebook “Girl with a Hand Plane” for more projects and tips!
